Color Like a Boss When You Don't Have All Your Favorite Tools for Masterpiece Making, Or How To Color While Traveling
by Michelle M. Johnson
(This post was updated October 10, 2019)*Any links to supplies found on Amazon are affiliate links. Should you decide to bring home an art tool I’m talking about and purchase it through the links found here, a few pennies of that purchase are distributed to me. It isn’t much, but it (slowly) adds up—it’s a lovely way to support the content that I create, and it comes at no cost to you, which is awesome, too. Thanks, in advance, to anyone who supports my art in this way; I really appreciate it!
This original post dates all the way back to the beginning of 2017, but these colored pencil tips and tricks are EXACTLY what I needed to return to now in the fall 2019, as I have challenged myself to color this year's 3rd Annual HCWT Coloring Contest (Online!!) illustration using *only* a simple Blackwing Colors 12 Pencils Set.
My general rule of blog-thumb is if an idea is of value to me in my coloring adventures, it is probably going to be of some value to other coloring enthusiasts as well, which is why I have decided to revisit these ideas and update them.
Reading through these four bits of colored pencil advice, it dawned on me that some of these ideas would be MUCH easier to understand if they were accompanied by a video demonstration! Hence this YouTube tutorial of scumbling with increased and decreased hand pressure:)
I hope you find this re-visit to old blog posts to be as helpful in your current coloring adventures as I have! Now, read on, and continue to color like a boss right here, right now, in 2019!
(Original post, updated)
As mentioned in my last blog post, to be a successful, happy traveler, I need to have access to coloring.
But, coloring-while-traveling (or while staying away from my home base for any length of time) looks VERY different than coloring-in-my-studio.
Whether I'm traveling via car, train, or plane, cargo space is at a premium; I cannot pack my Prismacolor Premier Colored Pencils 150 set, my 96 set of Tombow Dual Brush Pens or even my smallest set of Staedler Fineliners, much less all my blenders, sharpeners, water brushes and color charts!
What I *do* travel with is my 24 count Koh-i-Noor Woodless Colored Pencils, and I do this for a few reasons:
1. Changes in pressure, altitude, and temperature have zero effect on them (quite a few markers, pens and colored pencils on the market don't like extreme changes in altitude or temperature).
2. Their carrying case is very sturdy and compact, guaranteeing that they won't get damaged if they are mishandled, and that they take up very little luggage space.
3. Koh-i-Noor Woodless Colored Pencils have a mighty sturdy color core, so they don't need to be sharpened often.
The only drawback to these beauties is that this travel-friendly set only has 24 colors, which means I have a very limited color palette to choose from when coloring on the go.
Rather than be frustrated by this lack of color choices while I am traveling, I've learned to lean on the following four colored pencil techniques to create coloring pages I feel happy about:)
INCREASING & DECREASING HAND PRESSURE
Because I don't travel with color blenders (they are made entirely of wax and melt easily), to create the illusion that colors blend and flow into each other on a given illustration, I utilize the very vibrant white of the paper most coloring books are printed on. Rather than saturating my coloring page with deep, heavy color, I allow bits of the base white of the paper to show through in specific places to create color blends and fades. I do this by paying attention to how much pressure I put onto my colored pencil, graduating color out or in and ignoring whether or not I am absolutely covering the white space totally with pigment. This technique allows for the effect of light and shadow to be a part of my coloring page, even though my palette is limited and I do not have a blender to pull different colors together smoothly on the paper.
 |
| I had very few colors to work with on this Mandala from Mystical Mandalas, but by graduating pressure in and out along the lines of the image, I achieved an effect of movement I rather like:) |
COLOR LAYERING
This simple trick is exactly what the name suggests it is: layering one color on top of another. How do you choose which colors to layer? That's entirely up to the effect you wish to create. If you're looking to create depth, begin with the lighter of your colors, and then slowly add darker colors to muddy the image. If you're looking to create an appearance of light, softly color with your darkest color first, and then go over that layer with a brighter color, using the scumbling, circular technique I mentioned above and increased pressure from your hand. The trick is to experiment because color layering is essentially color mixing without the ability to truly incorporate the colors fully. You never know what you're going to create until you just give it a try.
 |
| This vibrant coloring was done by my partner, Steve. He has zero fear in coloring, so color layering is one of his favorite techniques regardless of how many coloring tools he has at his disposal. Here he splashed color upon color to achieve a spacey effect in one of his favorite coloring books, Creative Haven Skyscapes. |
COLOR BUILDING
At first glance, color building looks like color layering, but there is a subtle difference. When color building, instead of putting different colors ON TOP of each other, begin with a single color on your coloring page and then slowly build other colors AROUND the original color.
 |
| My son, Sam, frequently color builds as he is a quick colorist and prefers to "get it done" as it were, rather than to go over a coloring page with a blender. I really love what he did with this cactus image from the coloring book The Cactus Coloring Book, and so did others - he won a coloring contest with this completed page when he was only 12:) |
If you want the appearance of brightness on your page, begin your color build with your lightest, brightest color (like Sam did on the above cactus flower petals - he chose a warm yellow), and surround it slowly with darker, contrasting shades (on the above cactus flower petals, the brick red Sam chose contrasts in a lovely way to the warm yellow, but the depth comes from his adding light streaks of black). Reversing that order will also get you an interesting look, as well as the appearance of colors morphing as they travel along an object.
Just like with color layering, color building takes a willingness to experiment and be okay with unexpected results. Taking these kinds of risks can be challenging for folks who are perfectionists (And, I'm the leader of that fabulous pack, let me tell you!), but coloring while traveling is a risk in and of itself: will you have adequate light, will there be a flat, hard surface, will people leave you alone long enough to enjoy a bit of coloring creativity? These are all unknowns you just have to face when coloring while traveling, so adding just a little more intensity to that creative jump isn't really all that much of a big deal, when you stop to think about it objectively:)
HATCH MARKS & SWIRLS
Not having access to all the shades of every color can be frustrating and tempt an avid colorist to over-pack, especially if you enjoy coloring in realistically drawn coloring books. But, you do NOT need all your greys, browns, blues and greens! You may have to enlarge the picture below to see the detail, but the trick I use to color realistic images while traveling is to utilize some pencil drawing techniques.
 |
| I typically am not a huge fan of coloring realistic images or human beings, but I adore my Sherlock Holmes: The Hounds of the Baskervilles coloring book! It's a totally awesome nerd experience to color Sir Arthur Conan Doyle's work:) |
I think in a former life I must have been a turtle because I really and truly wish that I could bring my entire house with me every time life provides me with the opportunity to travel. Leaving behind all of my art supplies and my cats is really emotionally difficult for me to do. But, my cats are even worse travelers than I am, and I have a whole room in my house devoted to creativity, so logistically speaking, I can't always get what I want.
But, I am an Aries, as stubborn as they come and used to getting her way (or at least a portion of it), which is probably why I stumbled upon these little tricks to help make the most of my coloring time, no matter where I was.
My hope is that these colored pencil tips will also be useful to y'all in your creative journeys:)
 |
| The coloring books that travel with me always change from journey to journey, but this set of Koh-i-Noor Woodless Colored Pencils and my T'Gaal Pencil Sharpener have traveled with me far and wide. |
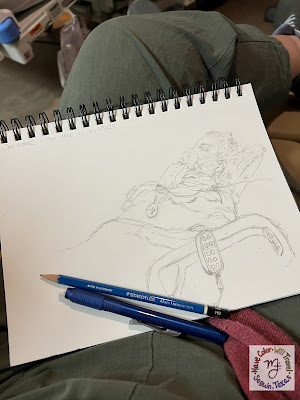
I have yet to complete my 3rd Annual HCWT Coloring Contest (Online!!) coloring page, but so far, I am feeling pretty good about how it is coming along, even with my very limited coloring tools and palette!
 |
| I love #WIP photos, even my own! They remind me that EVERYTHING in life is a process, EVERYTHING in life takes time. |

This is probably my favorite blog post from you yet because it's gorgeous, an easy read, has a video tutorial, AND gives the reader loads of good advice for how to Color Like A Boss. Love this one and really need to give cross hatching a try in my coloring!
ReplyDelete